Getting started with Spring
Create a RESTful Web Service. Blog post by Ionuț Alixăndroae
Getting started with Spring - Tutorial
The main idea of this blog post is to demonstrate how to create a simplistic RESTful API using Spring in less than 10 minutes.
Even though I'm proficient in Java, I haven't really coded more than one or two applications using Spring, so I'm taking this opportunity to learn more about it and also to blog my experience.
This might become the first blog post in a longer series, it's a small setup, but will add more functionality on the road 🛠
Spring makes Java simple
This is the first thing we see when we go to the official Spring website.
What is Spring?
In other words, especially if you're coming from a JavaScript world where you're used to developing an entire back-end using Node.js and then have to use NPM to install all the missing and needed libraries and modules (eg. ExpressJS for an API, modules or libraries for data parsing, data checking and validation, security, etc.), with Spring Framework you get almost everything in one go in order to be able to create enterprise back-end systems, APIs and applications.
Documentation & resources
If you're interested in the official documentation, you can find it here.
Installation & configuration
I've used the official website and documentation, so the first thing I did was to get a Java Spring boilerplate down. You can go here and get a pre-initialized project. You can update the project metadata if you wish or just click Generate to download a .zip file.
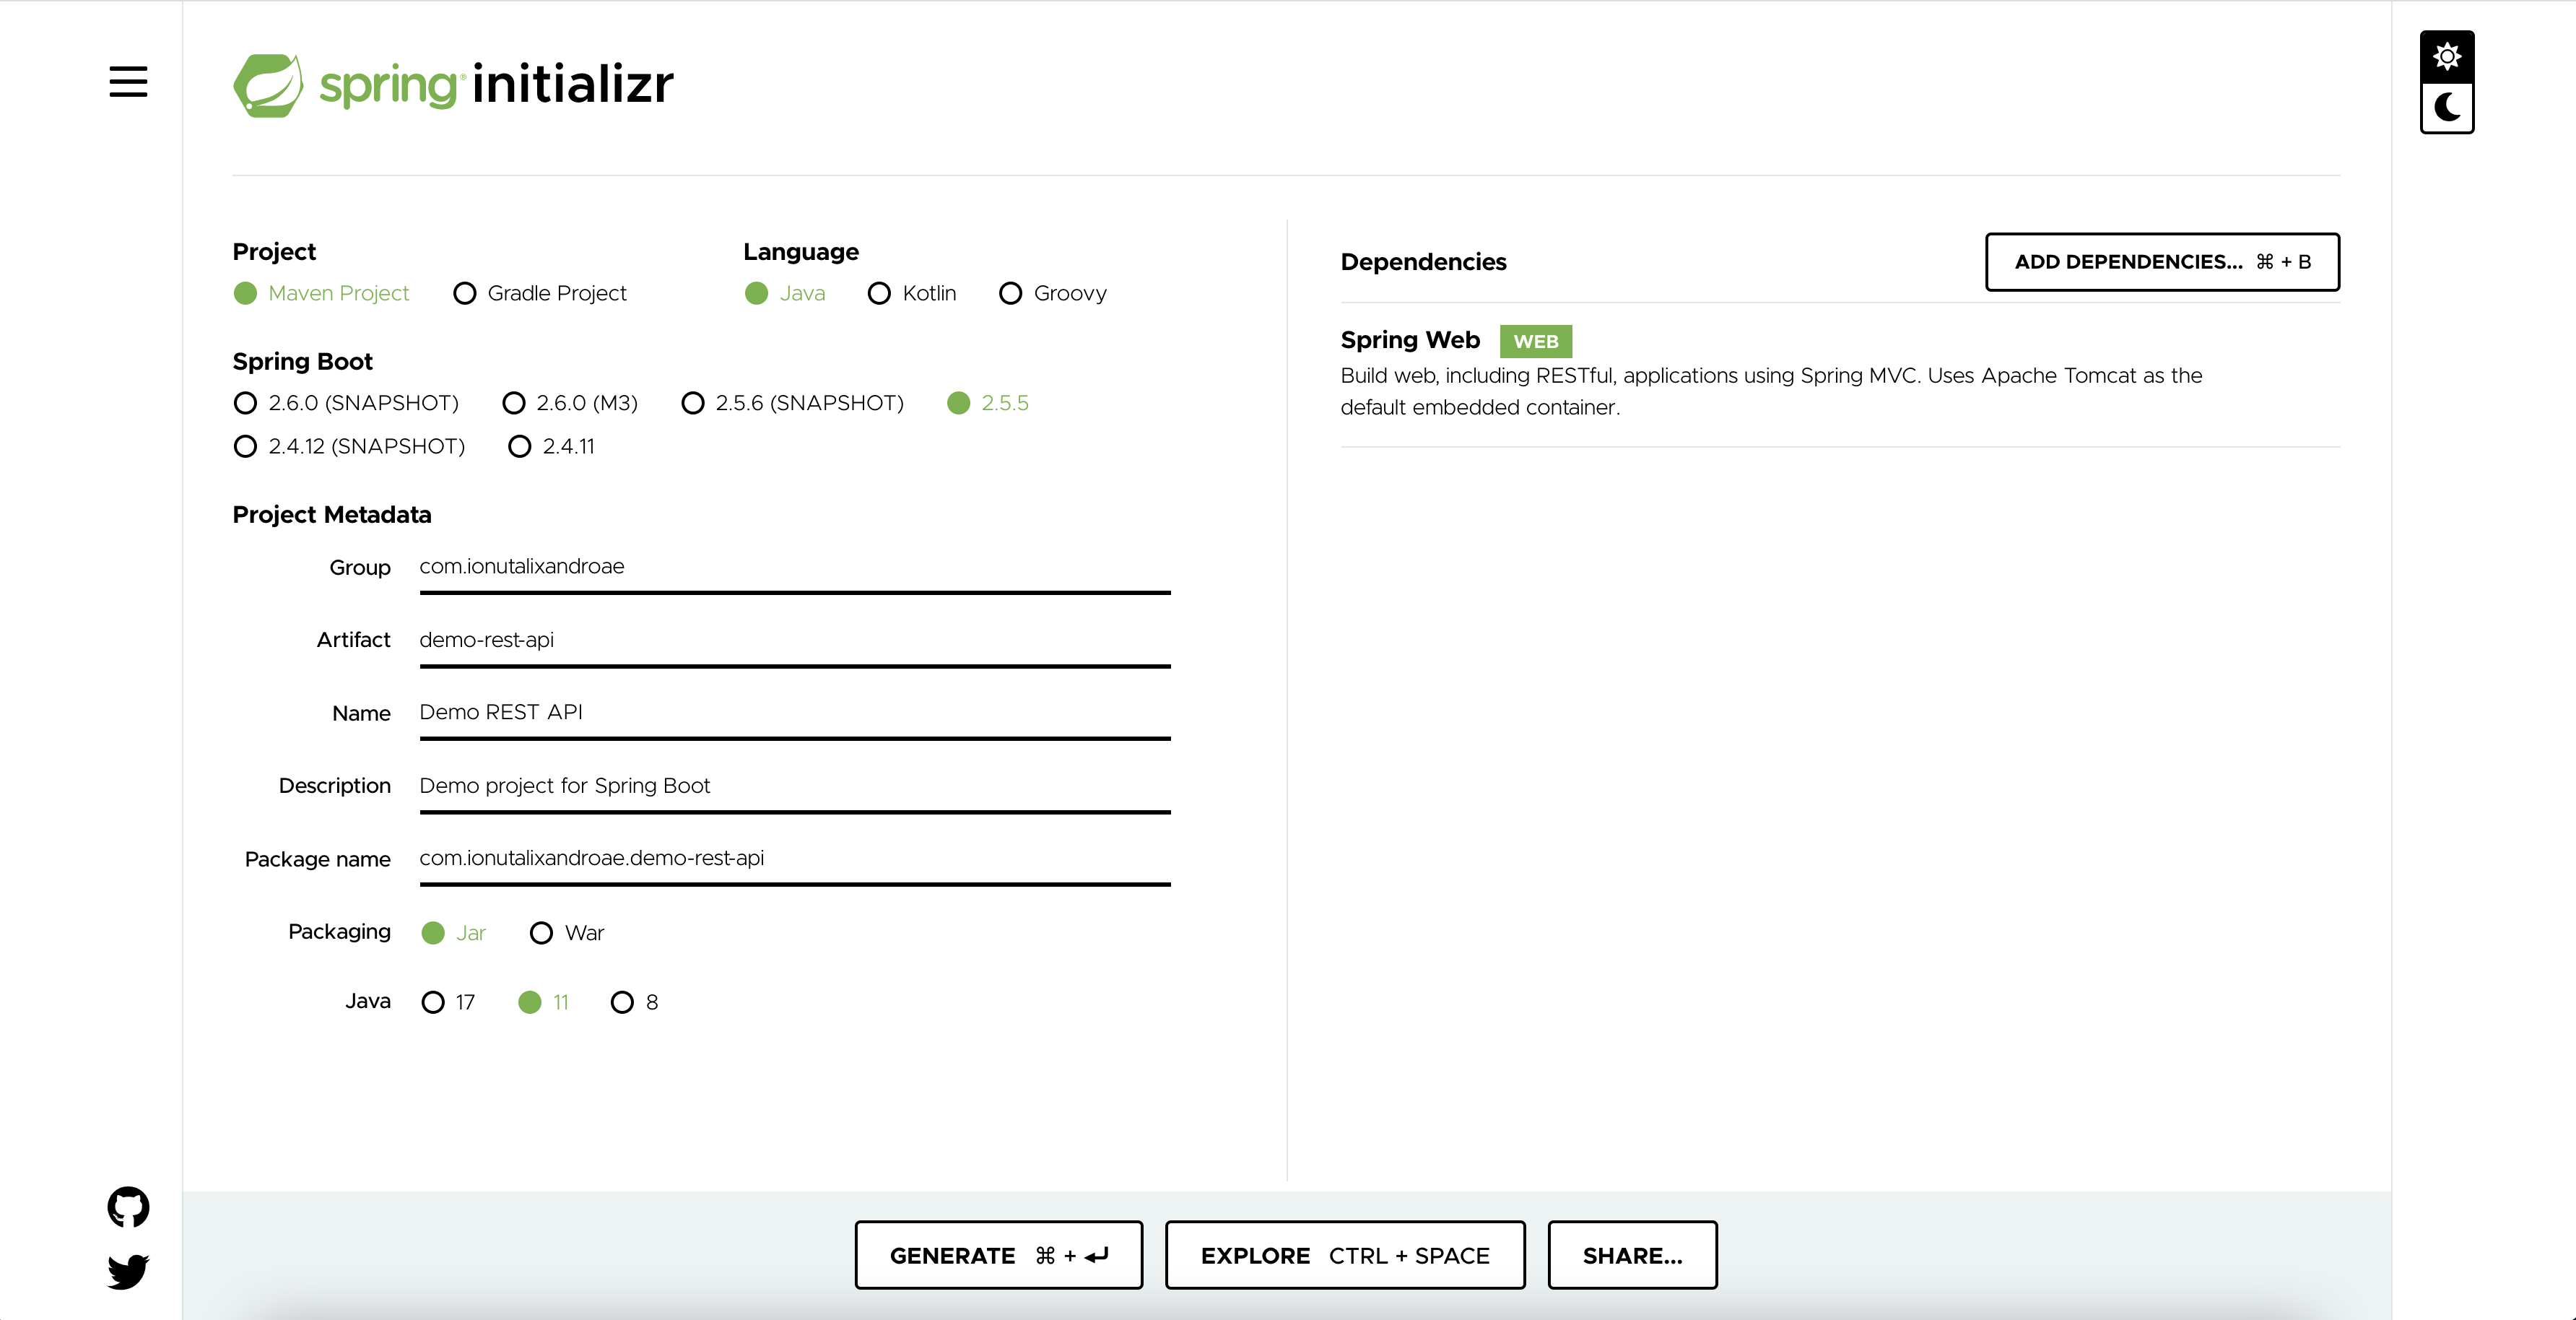
You can move the downloaded .zip in the desired location (folder) and open your new project there. I used InteliJ IDEA Community in this tutorial together with Maven.
Base setup
After opening the project, the IDE will usually take care of installing all the needed libraries and modules. Inside the pox.xml file you can see the project's metadata, artifacts and all the base dependencies.
<?xml version="1.0" encoding="UTF-8"?>
<project xmlns="http://maven.apache.org/POM/4.0.0" xmlns:xsi="http://www.w3.org/2001/XMLSchema-instance"
    xsi:schemaLocation="http://maven.apache.org/POM/4.0.0 https://maven.apache.org/xsd/maven-4.0.0.xsd">
    <modelVersion>4.0.0</modelVersion>
    <parent>
        <groupId>org.springframework.boot</groupId>
        <artifactId>spring-boot-starter-parent</artifactId>
        <version>2.5.5</version>
        <relativePath/> <!-- lookup parent from repository -->
    </parent>
    <groupId>com.ionutalixandroae</groupId>
    <artifactId>demo-rest-api</artifactId>
    <version>0.0.1-SNAPSHOT</version>
    <name>Demo REST API</name>
    <description>Demo project for Spring Boot</description>
    <properties>
        <java.version>11</java.version>
    </properties>
    <dependencies>
        <dependency>
            <groupId>org.springframework.boot</groupId>
            <artifactId>spring-boot-starter-web</artifactId>
        </dependency>

        <dependency>
            <groupId>org.springframework.boot</groupId>
            <artifactId>spring-boot-starter-test</artifactId>
            <scope>test</scope>
        </dependency>
    </dependencies>

    <build>
        <plugins>
            <plugin>
                <groupId>org.springframework.boot</groupId>
                <artifactId>spring-boot-maven-plugin</artifactId>
            </plugin>
        </plugins>
    </build>

</project>
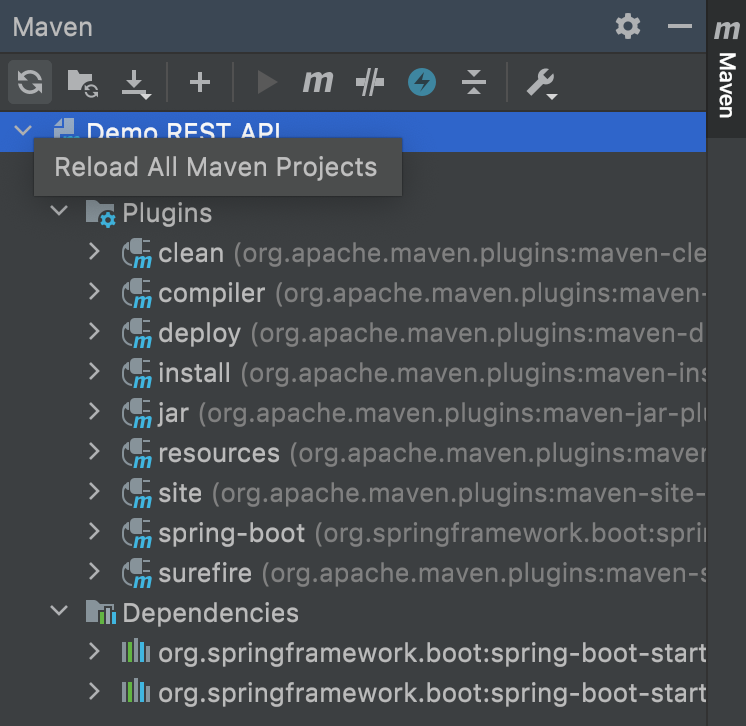
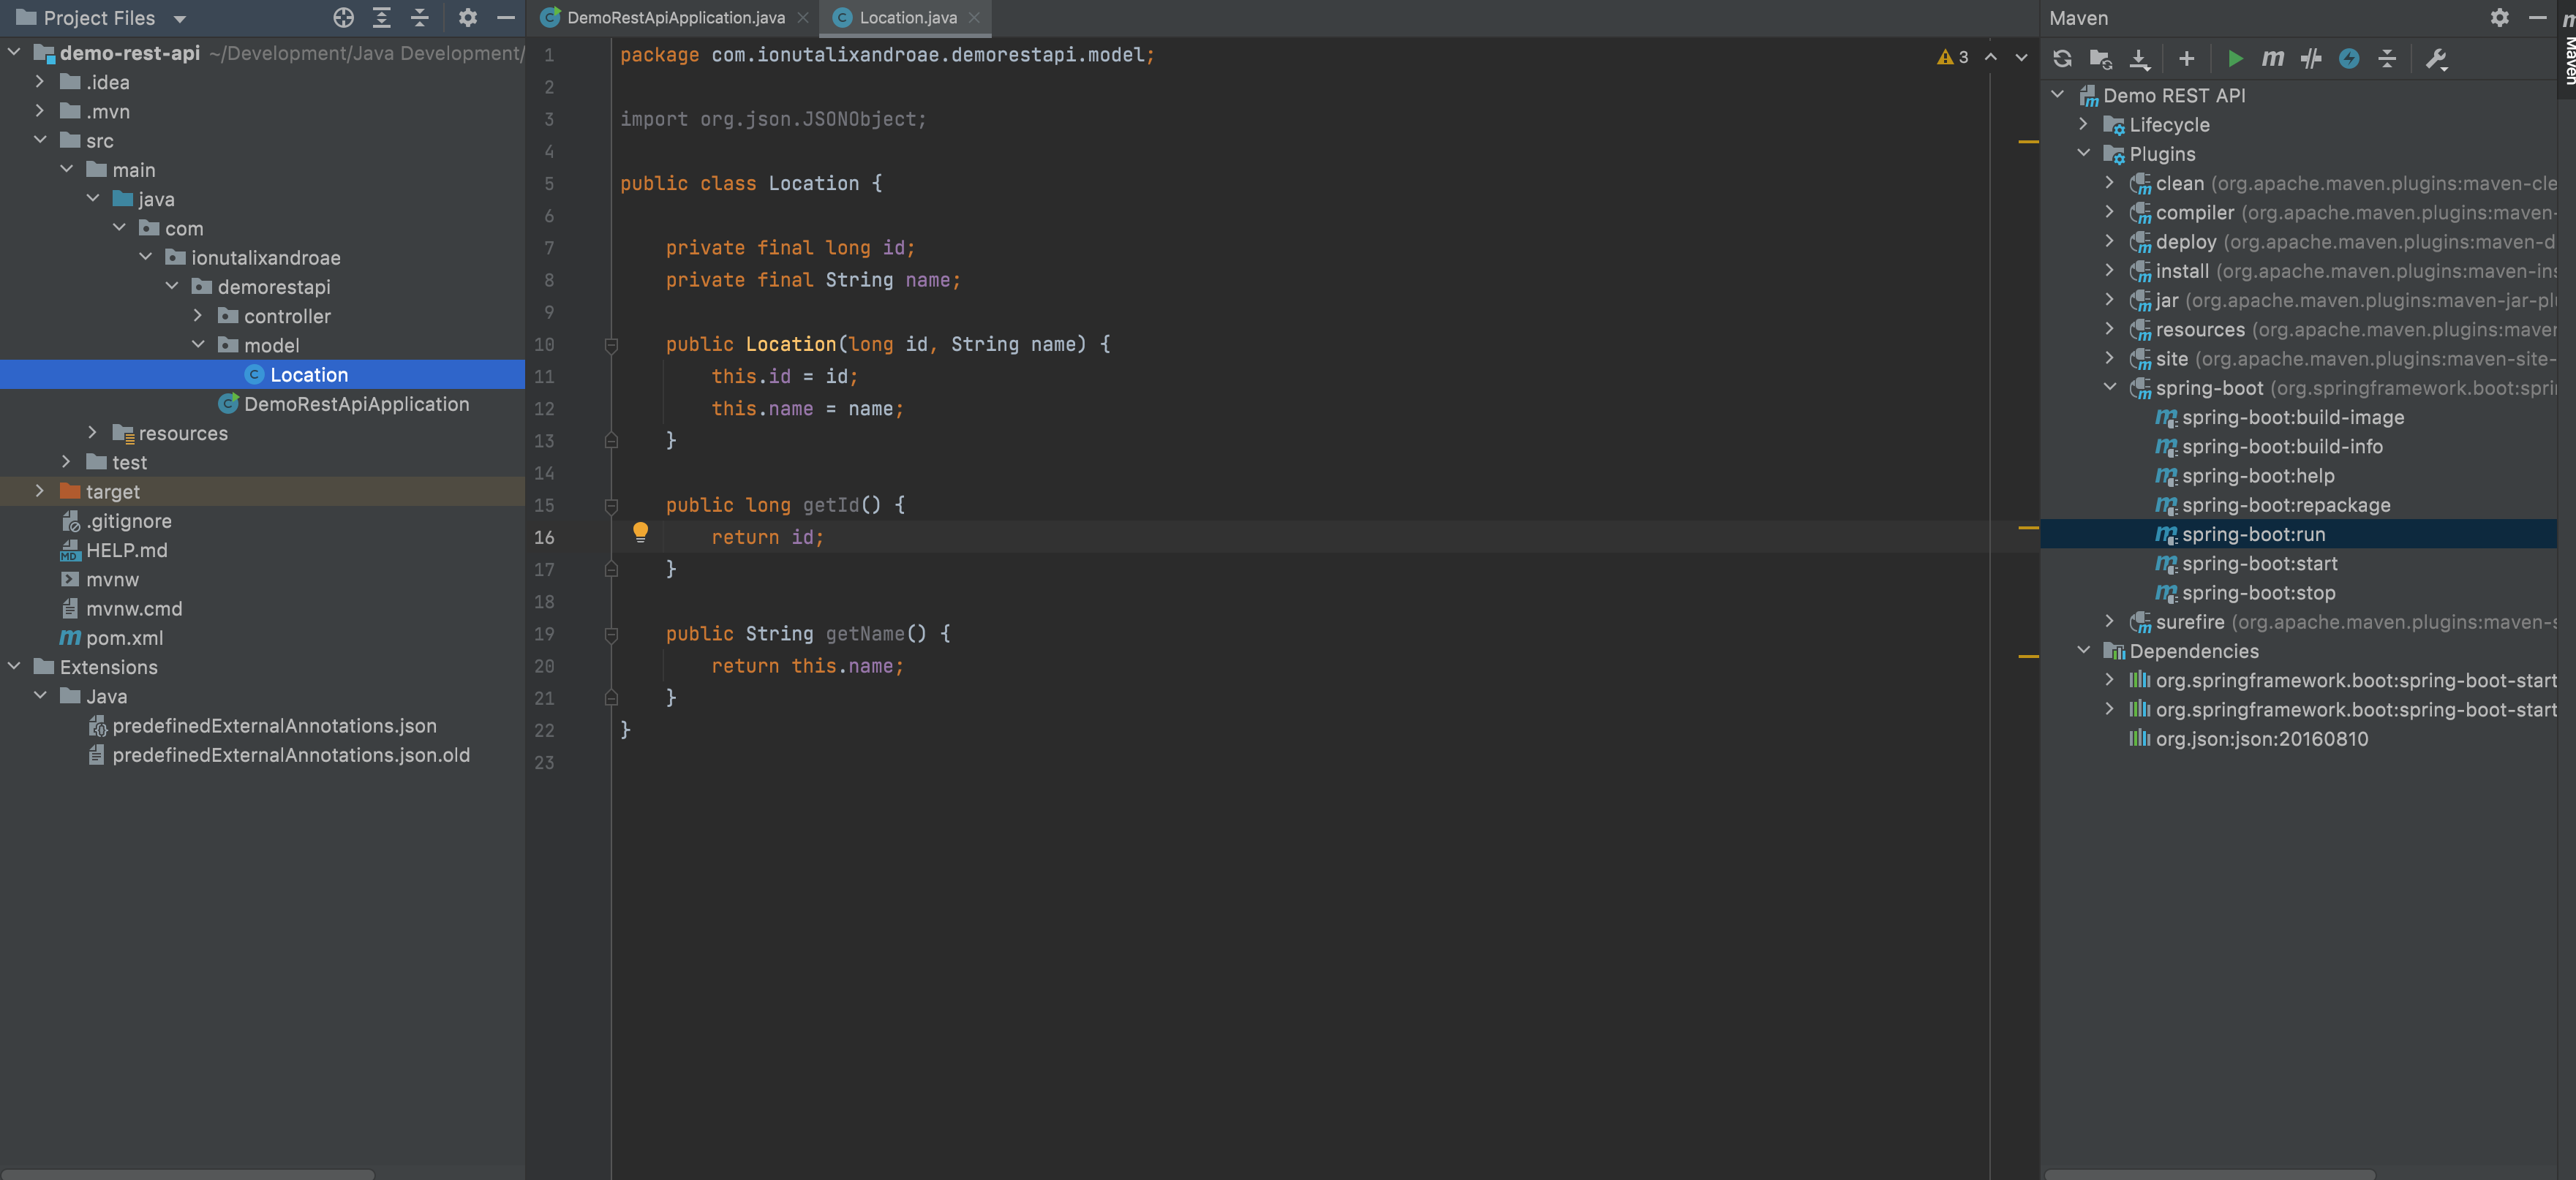
If you wish to re-install them, remove one dependency or add a new one, you can open the Maven panel by going to View -> Tool Windows -> Maven
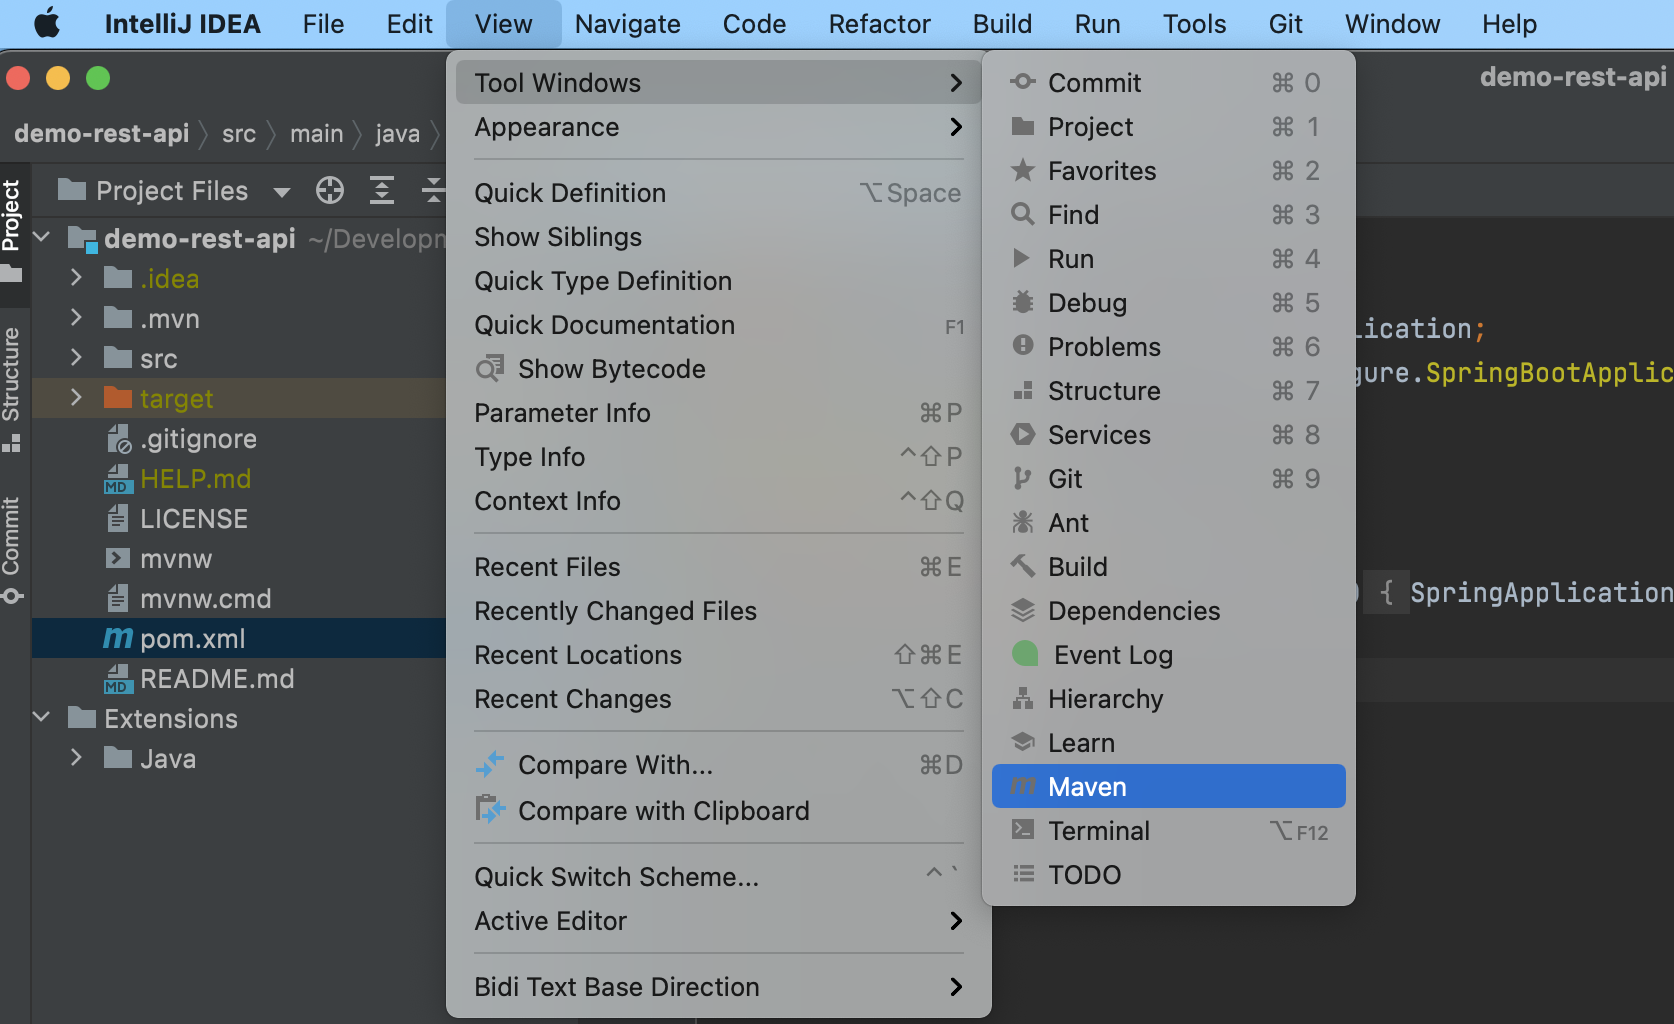
Then simply click Reload All Maven Projects (first button from left to right).
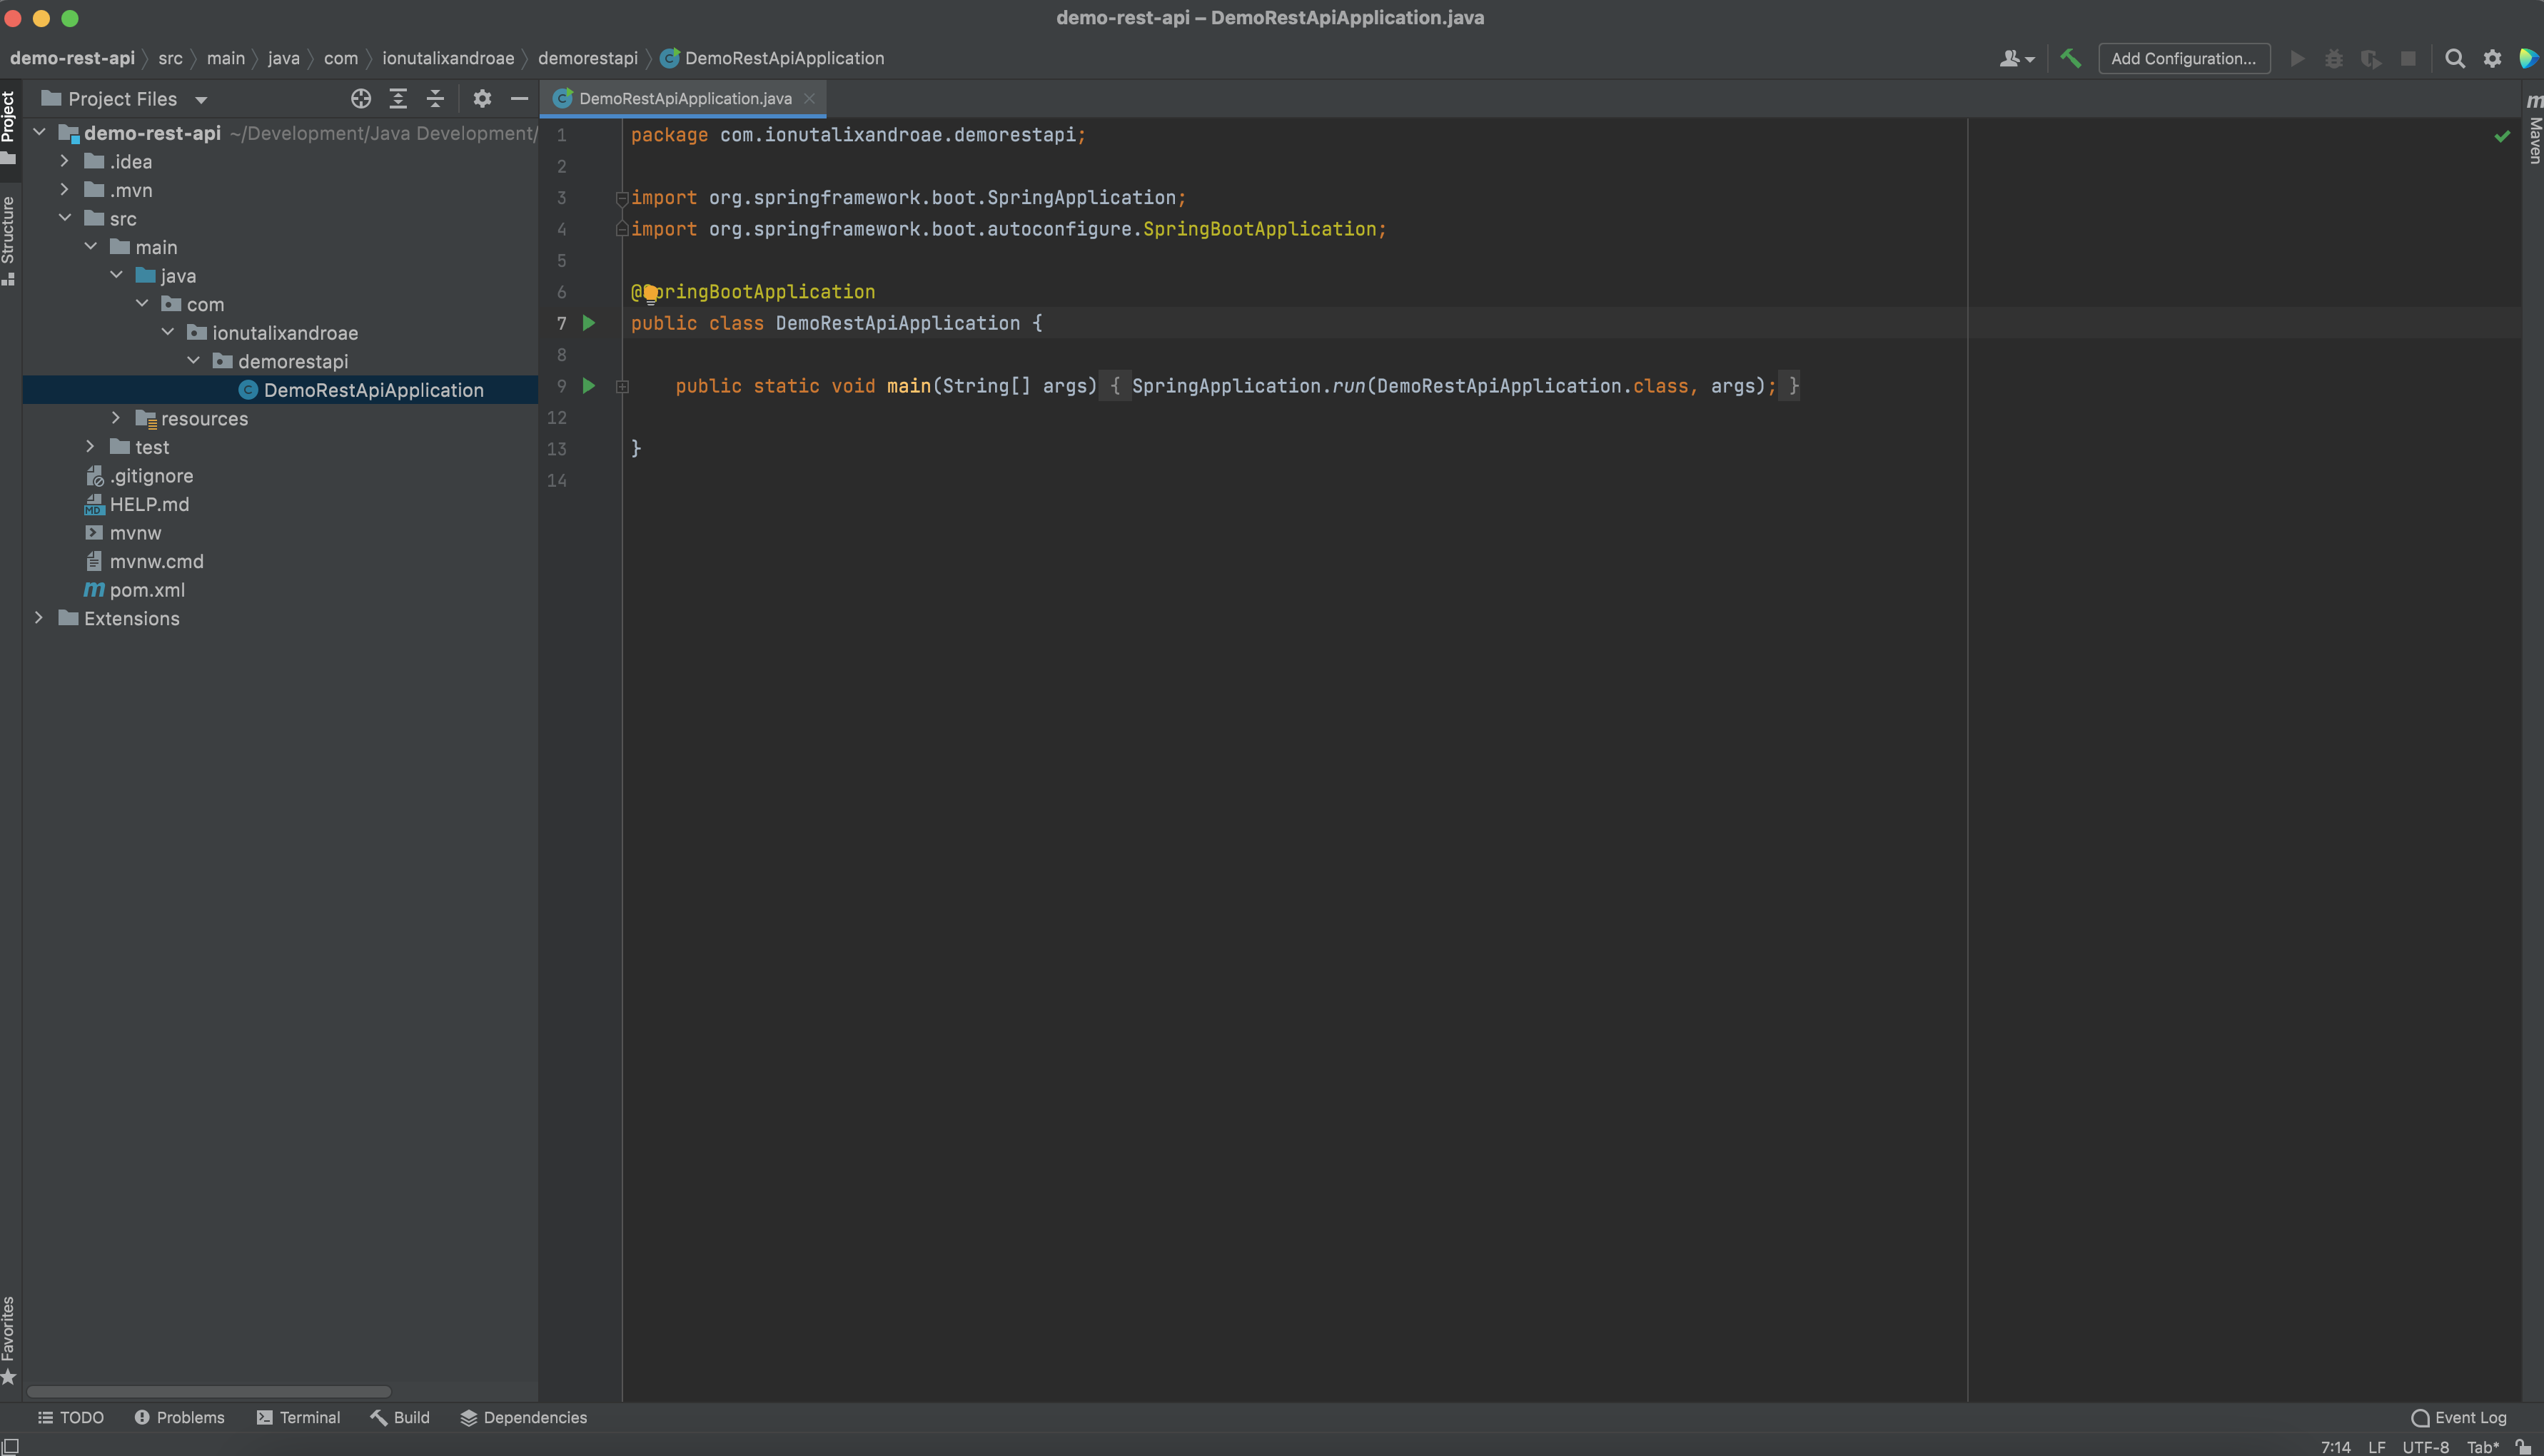
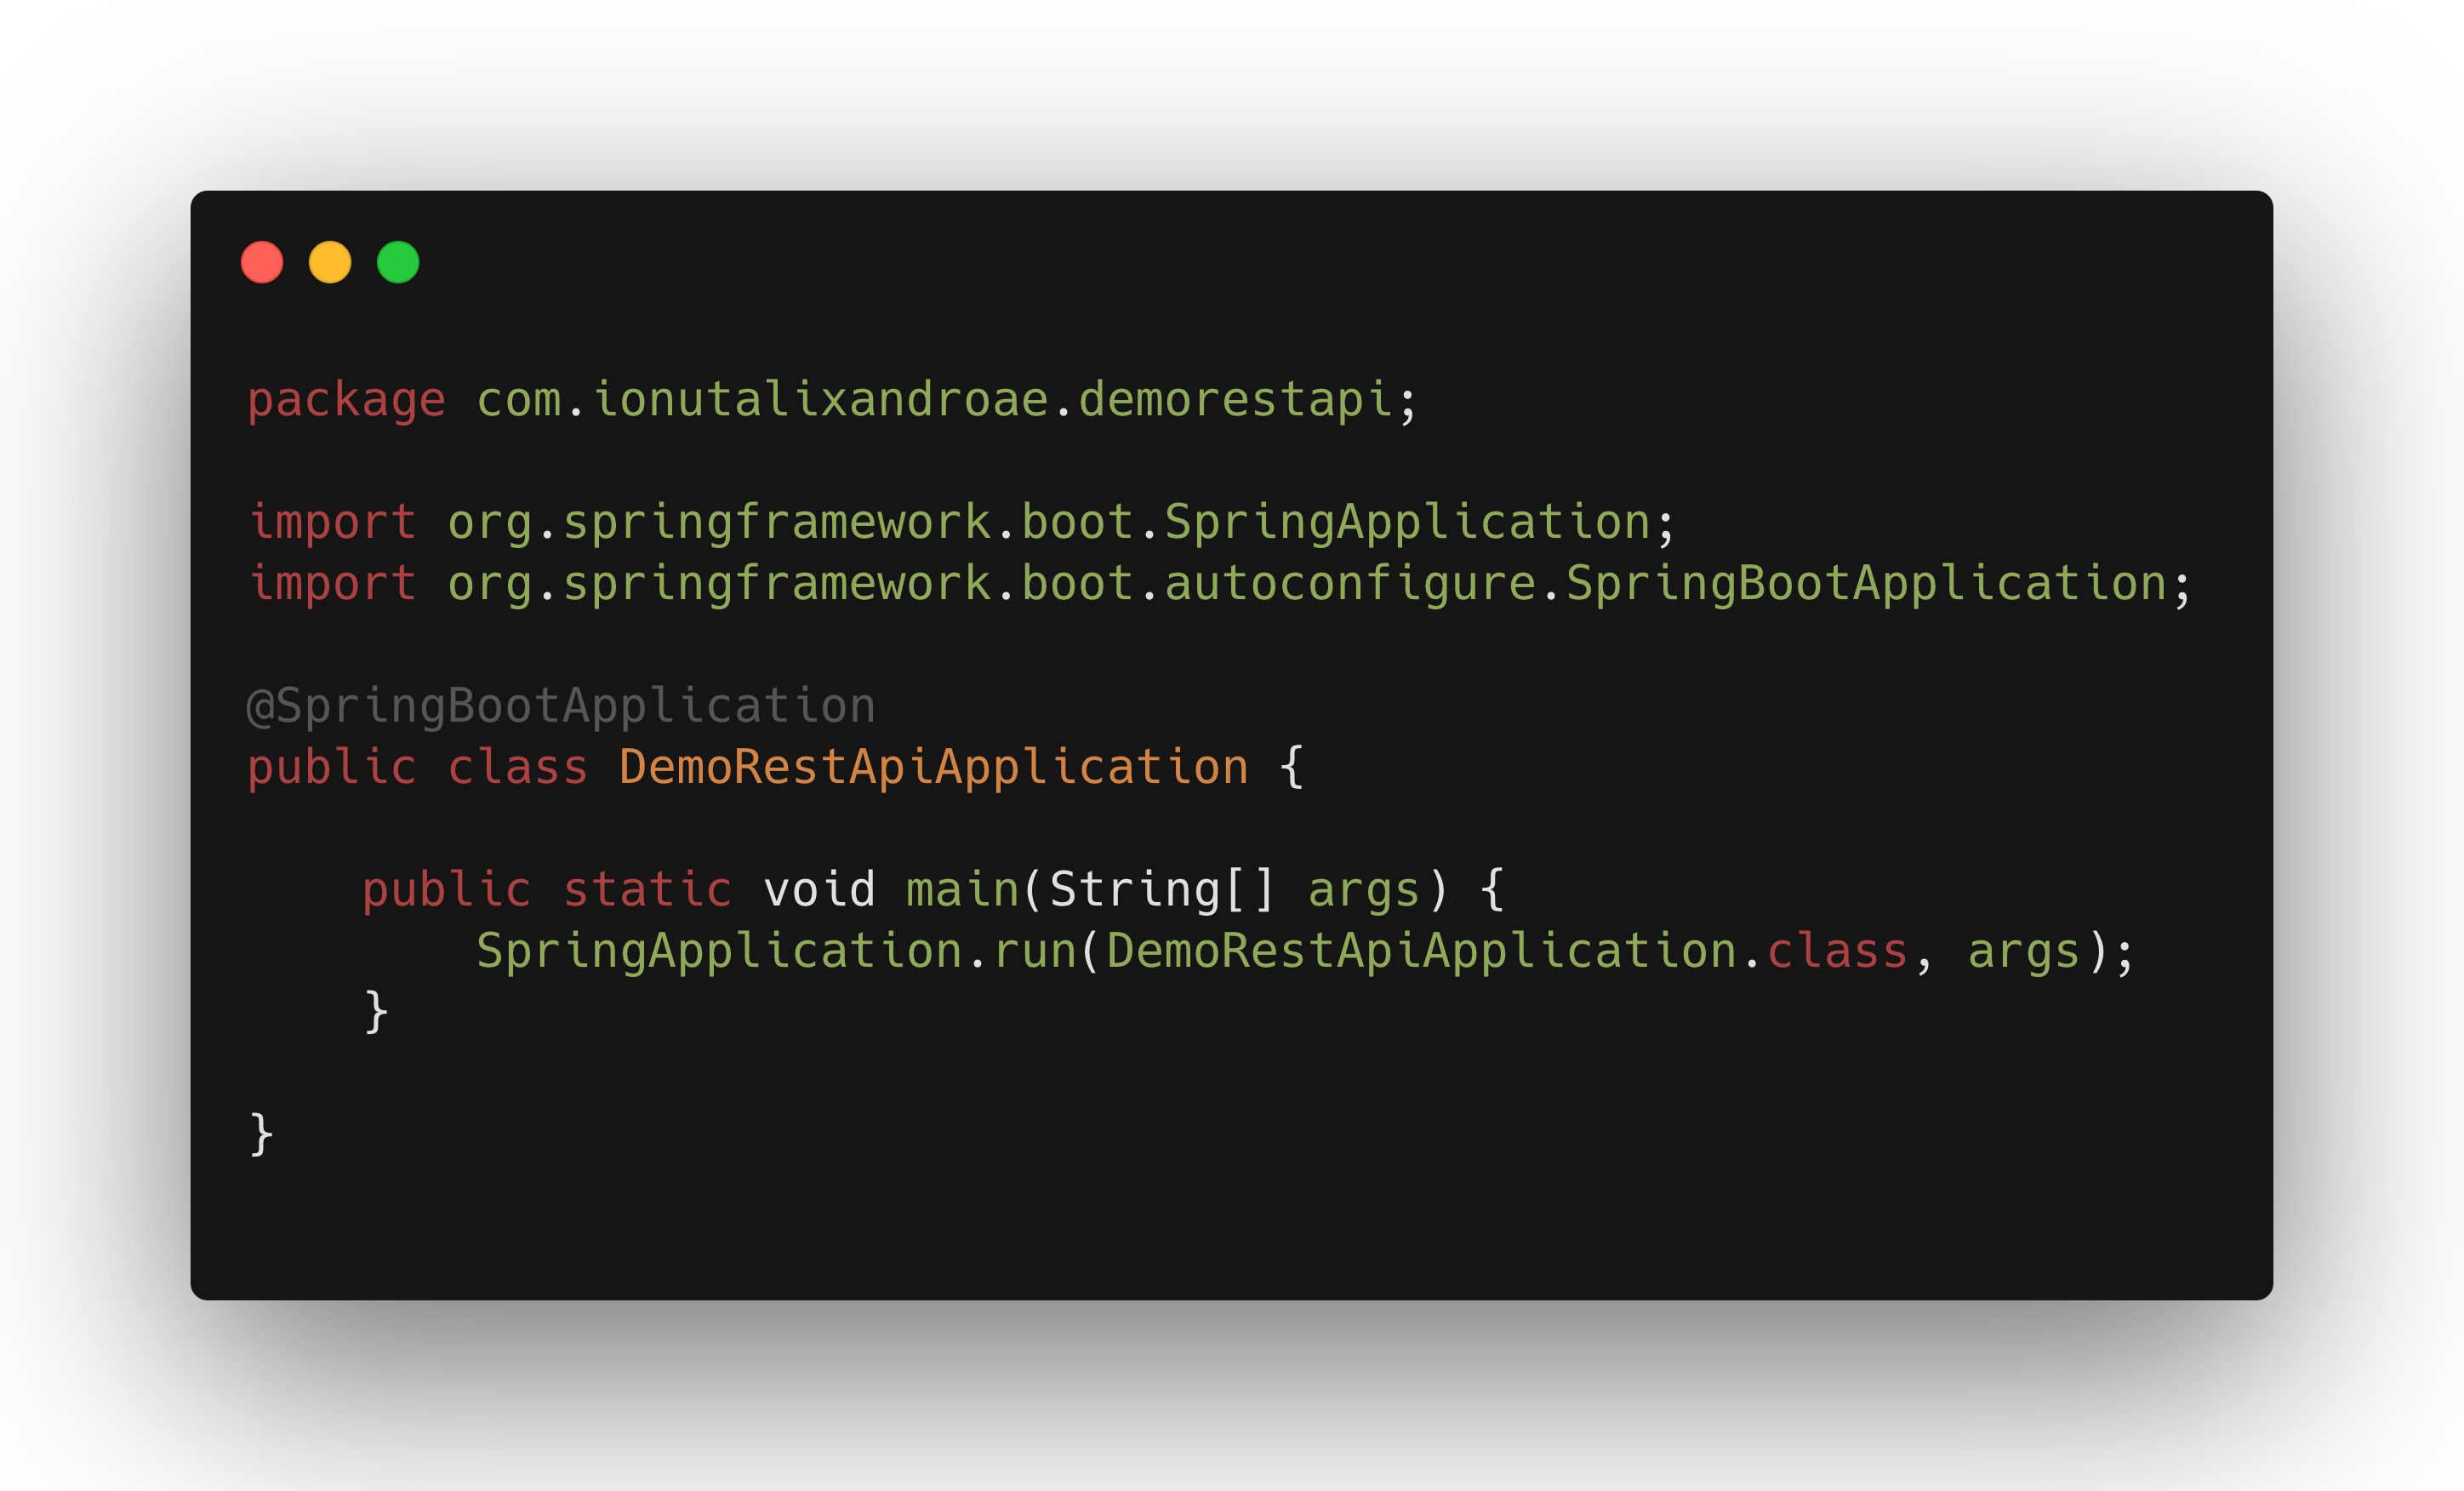
Web Service entry point is the DemoRestApiApplication.java file
First endpoint - Get location coordinates by name
The first endpoint of this web service is a simple GET request that will accept a query parameter and return a JSON response (resource).
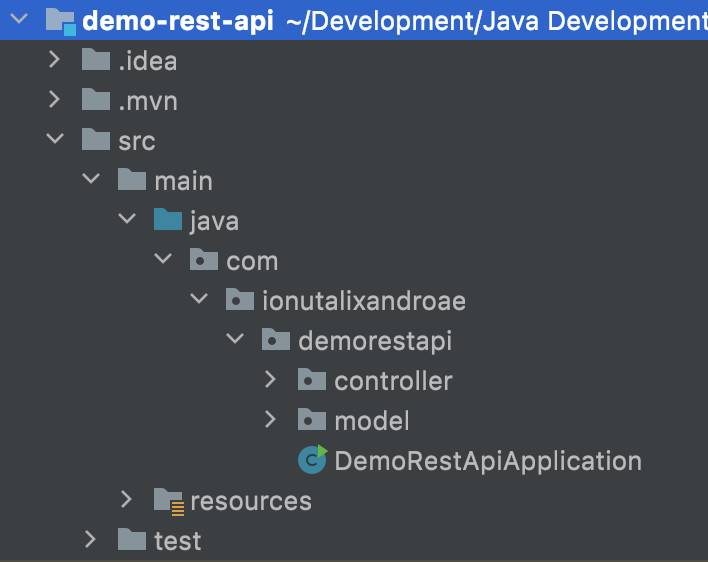
I created two new folders named controller and model.
The idea of the endpoint is to be able to take the name of any location as a query parameter and return a JSON response with its coordinates (latitude and longitude), plus other information.
Model
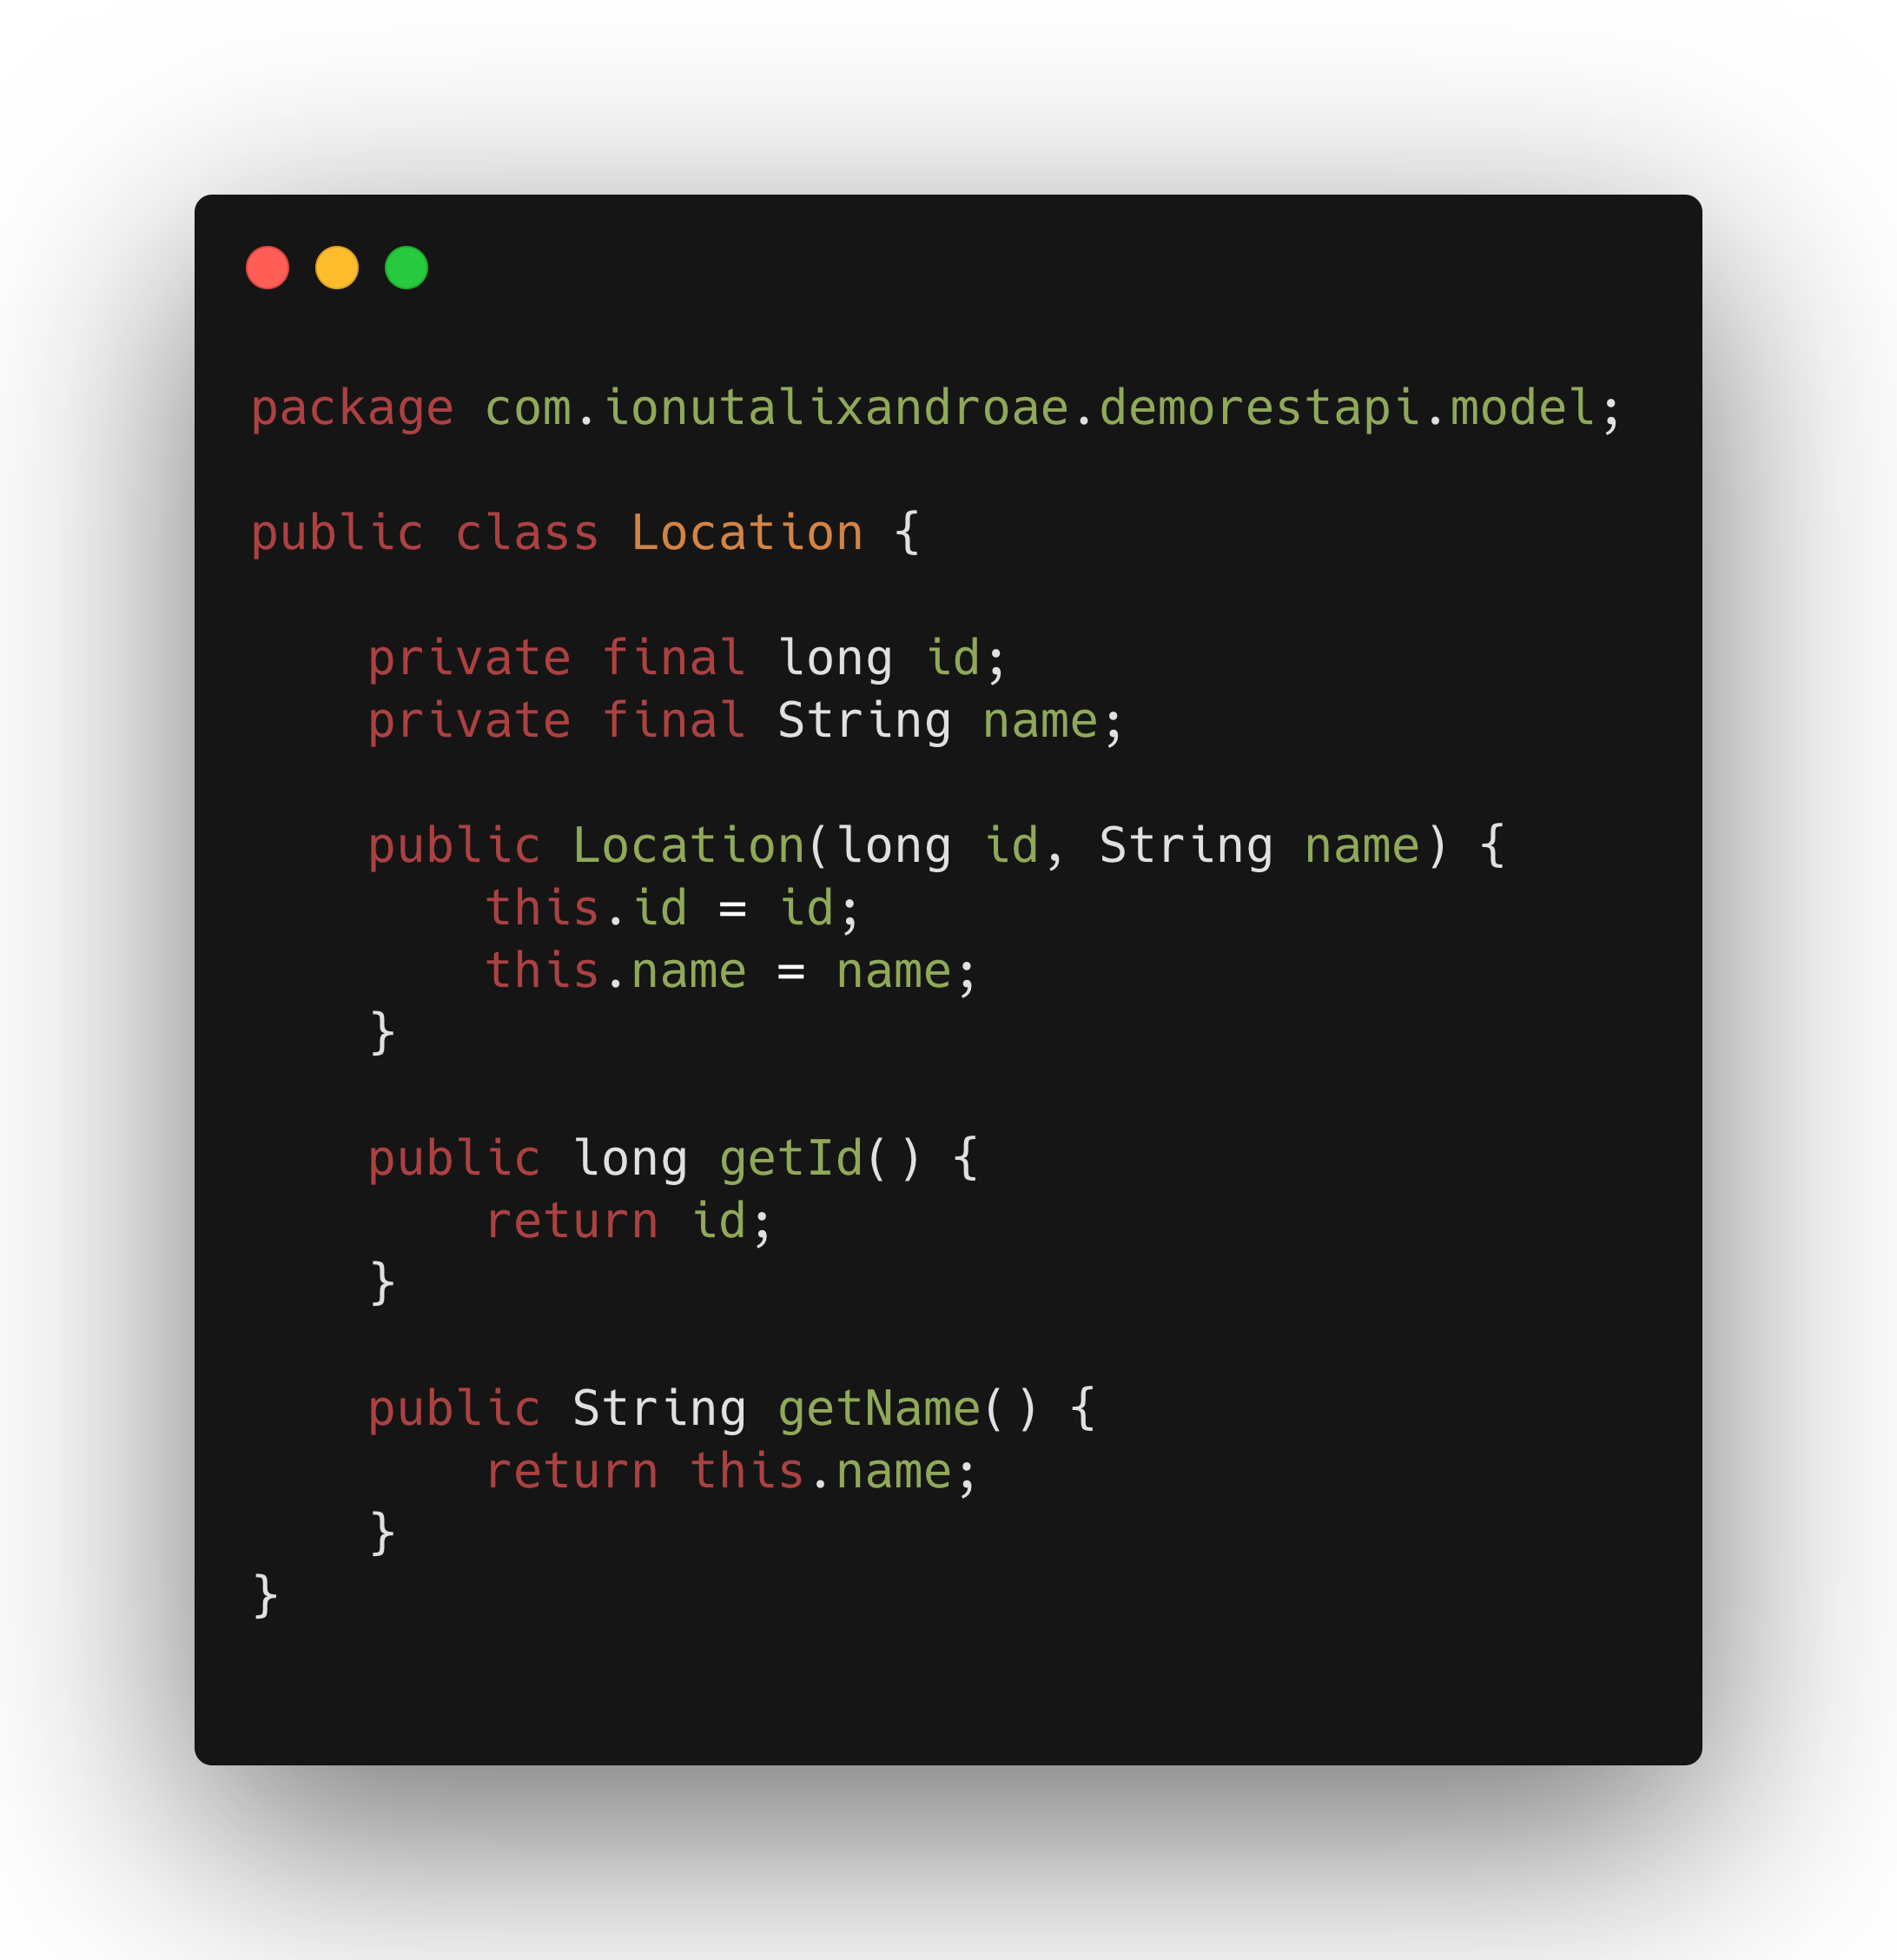
I am creating a new Java class representing this resource inside the model folder. This class will define the way the JSON response will look like: properties, names, values and its name is Location.java.
We're starting with a basic class setup:
- two class attributes/properties named id and name
- one class constructor which is mouting the values for those fields
- two public getter methods to retrieve the fields
The field name will take the value passed via the endpoint's query parameter and the id will be an atomic integer (LongInteger used in applications such as atomically incremented counters).
What we want next is to take that name value and to pass it to another API in order to get some location information about it, together with the coordinates. For this, I'm using this service, which is a really simple API to use and powerful enough to return all the needed information.
I've updated the Location class by adding a new field called locationInformation which will store the results returned by the aforementioned API, one private method to perform the API request and mount the data and two public getter methods, one to return this object and another one to parse it and to extract the location's coordinates.

package com.ionutalixandroae.demorestapi.model;

import com.fasterxml.jackson.databind.JsonNode;
import com.fasterxml.jackson.databind.ObjectMapper;

import java.io.*;
import java.net.URL;
import java.util.HashMap;
import java.util.Map;

public class Location {

    private final long id;
    private final String name;
    private final JsonNode locationInfo;

    public Location(long id, String name) {
        this.id = id;
        this.name = name;
        this.locationInfo  = this.getLocationInfo(name);
    }

    public long getId() {
        return id;
    }

    public String getName() {
        return this.name;
    }

    public Map<String, Double> getCoordinates() {
        if (this.locationInfo != null) {
            Map<String, Double> coordinates = new HashMap<>();
            Double latitude = this.locationInfo.get("feature").get("geometry").get("y").asDouble();
            Double longitude = this.locationInfo.get("feature").get("geometry").get("x").asDouble();
            coordinates.put("latidude", latitude);
            coordinates.put("longitude", longitude);
            return coordinates;
        }
        return null;
    }

    public JsonNode getLocationInfo() {
        return this.locationInfo;
    }

    private JsonNode getLocationInfo(String name) {
        String urlString = String.format("https://geocode.arcgis.com/arcgis/rest/services/World/GeocodeServer/find?text=%s&f=json", name);

        try {
            InputStream stream = new URL(urlString).openStream();
            JsonNode results = new ObjectMapper().readTree(stream);
            JsonNode locations = results.get("locations");
            JsonNode bestResult = locations.get(0);
            return bestResult;
        } catch (Exception e) {
            e.printStackTrace();
            return null;
        }
    }
}
It is a very simple class with one helper method that is doing the hard word and then a bunch of public getters to return the information ready for the endpoint.
Controller
Inside the controller folder I'm creating a new class named LocationController.java.
In Spring’s approach to building RESTful web services, HTTP requests are handled by a controller. These components are identified by the @RestController annotation, and the LocationController handles GET requests for /location endpoint by returning a new instance of the Location class
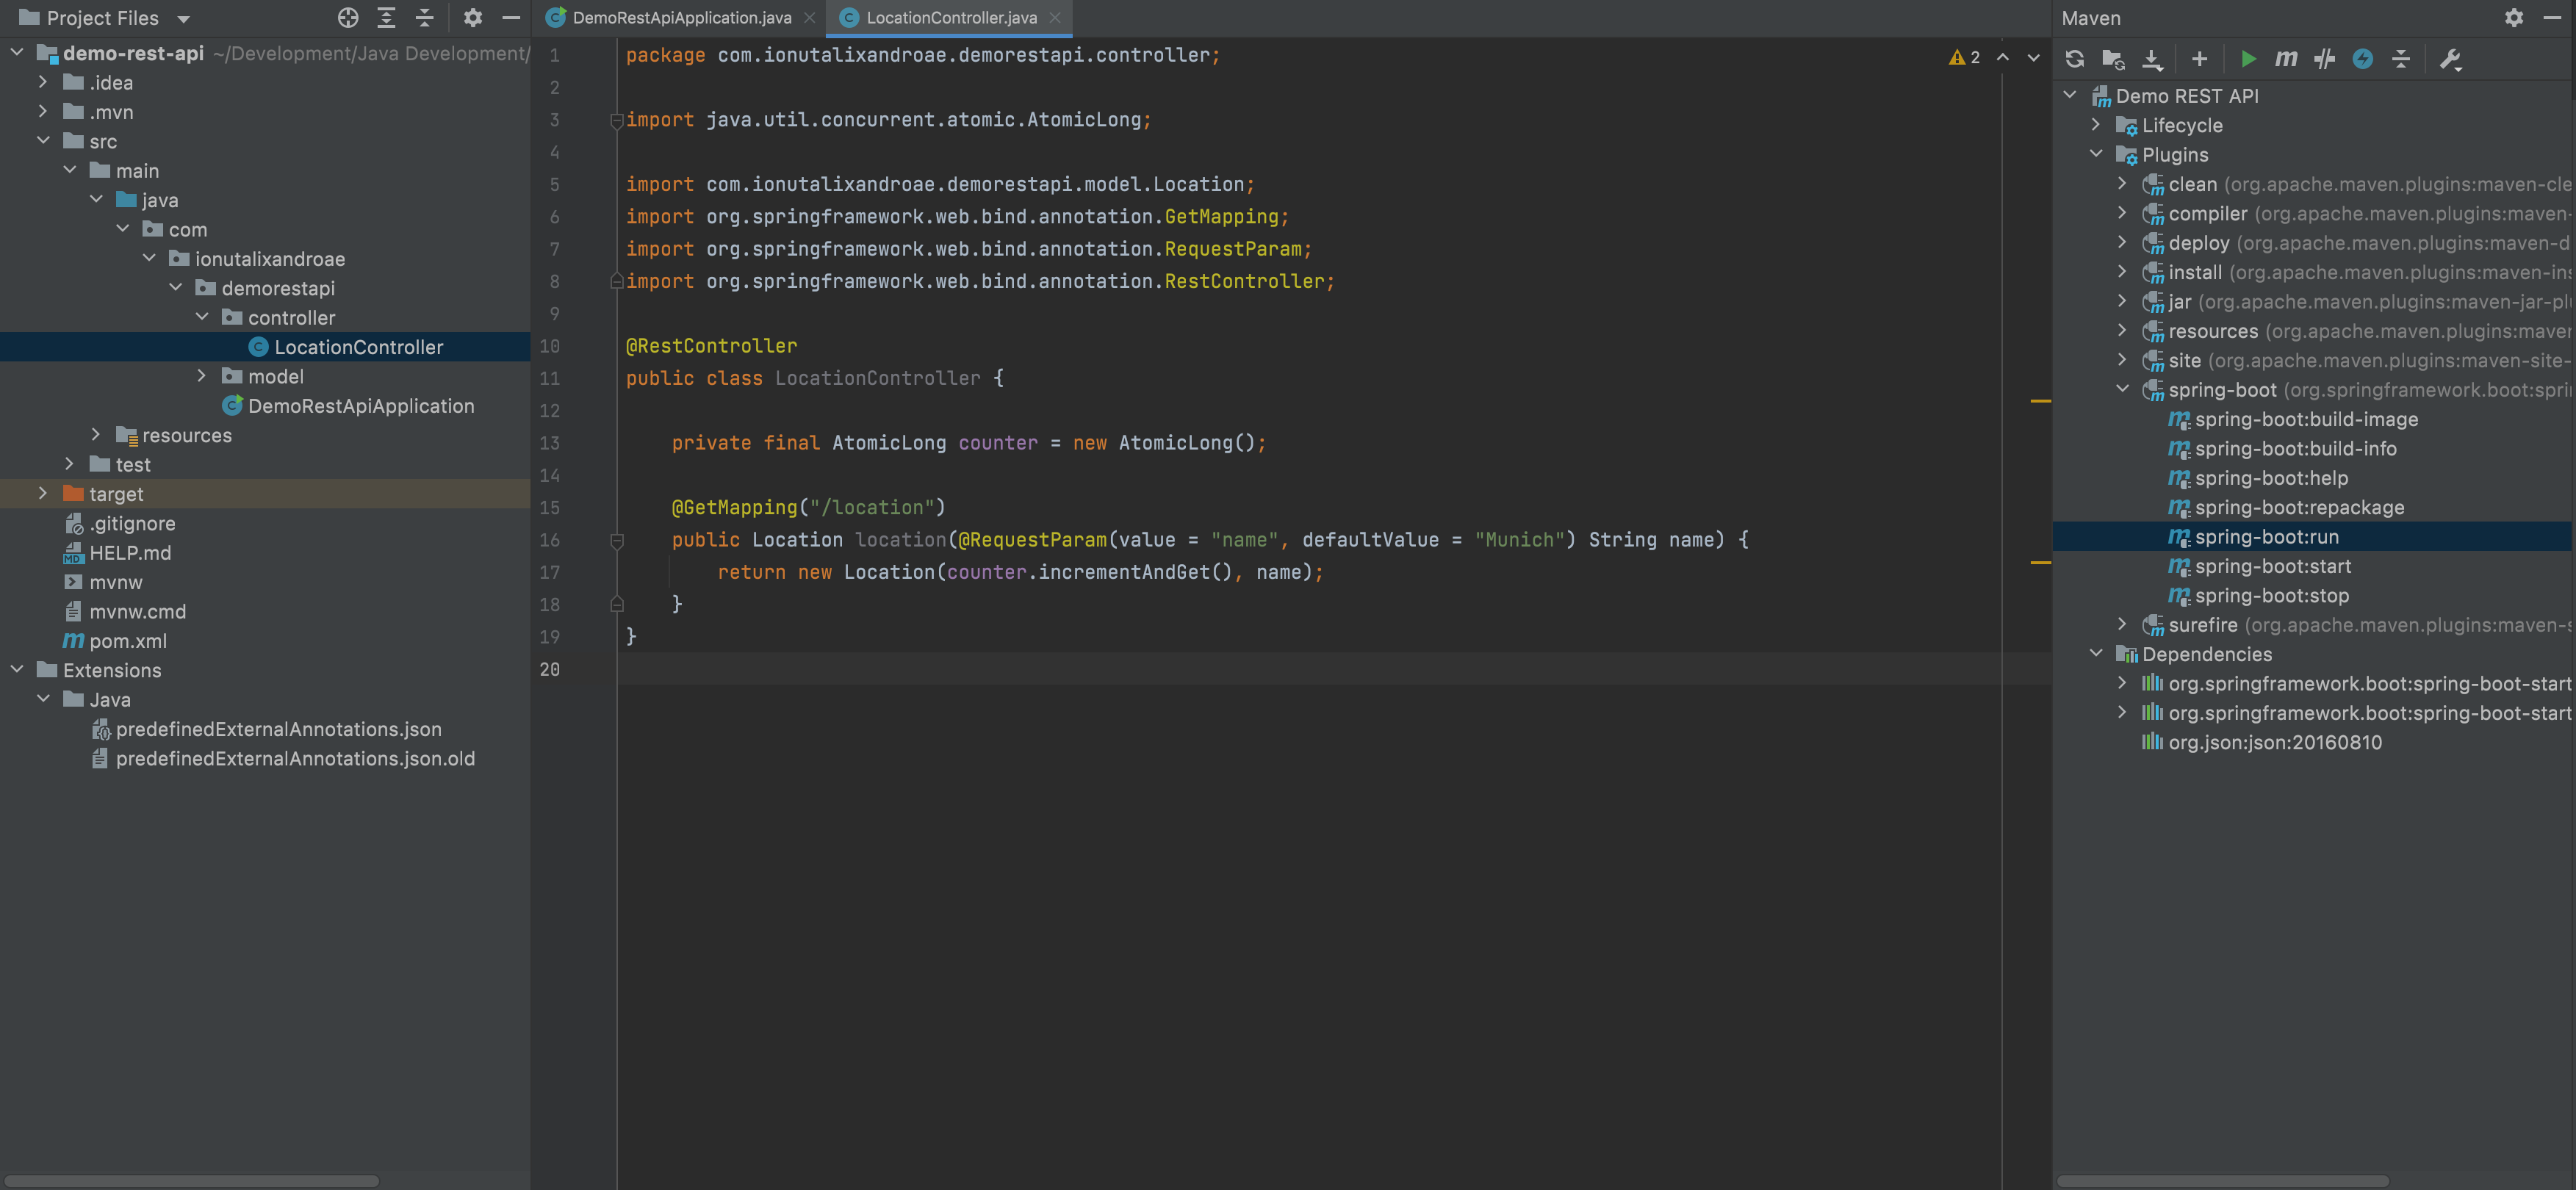
The @GetMapping annotation ensures that HTTP GET requests to /location are mapped to the location() method.
@RequestParam binds the value of the query string parameter name into the name parameter of the location() method. If the name parameter is absent in the request, the defaultValue of Munich is used.

A new Location object is returned and written directly to the HTTP response as JSON thanks to Spring's message converter mechanism named Jackson 2.
Testing the web service
In order to rest the newly created web service you can either run the application inside InteliJ IDEA, run the application inside the terminal or build an executable JAR.
Run in InteliJ IDEA
Simply right-click the command spring-boot:run inside the Maven panel and then click Run Maven Build.
This will open a terminal panel where you can see the server booting up.

Run in terminal
Open a new terminal and go inside the project folder.
Then simply run the ./mvnw spring-boot:run command.
$ ./mvnw spring-boot:run
Create executable JAR
Alternatively, you can build the JAR file with ./mvnw clean package command and then run the JAR file, as follows using java -jar target/demo-rest-api-0.1.0-SNAPSHOT.jar
$ ./mvnw clean package
$
$ java -jar target/demo-rest-api-0.1.0-SNAPSHOT.jar
Test Using Postman or browser
After the web service (server) is up and running, you can use Postman or directly the browser for endpoint testing.
Simply put the http://localhost:8080/location?name=Munich URL in to a GET request and send it.

Or access the URL in your browser.

Conclusions
To be honest, I am quite fascinated by Spring, its simplicity and power in creating web services and I'm pretty sure it has many many other options and customization methods to create enterprise level back-ends.
I'm planning to keep exploring it and improve the current project, perhaps connecting it to a database and expose all CRUD operations, plus adding security to it, payload validation and such.
The MVC design pattern enforced here is different in style than the freedom you get with creating a similar API with Node.js and ExpressJS, but I think the strongly type language together with this design can bring more safety in the long run.
That's not to say that one cannot adopt such design and style with Node.js. There are lots of boilerplates available on GitHub where Node.js + ExpressJS is used together with TypeScript.
In the future, I'm planning to create a new blog post where the same type of web service is created with Node 🚀 ✌️
At the same time, as written above, I will want to expand and continue this project and will try to blog every step and every new piece of functionality ✍️ 🖥
Stay tuned! 📻 ⚡️
PS. You can find the entire project on my GitHub here.